How to use Charles Proxy to rewrite HTTPS traffic for web applications
Charles Proxy is an application that sits between your computer and the Internet to record HTTP(S) traffic. Most importantly for me, it has the ability to also modify a server’s HTTP response. I’ve been using Charles over the past few weeks to rewrite responses from our APIs and I’ve been slowly learning what Charles is capable of but also what it isn’t. Needless to say, there’s still a lot to learn, but the defining moment for me was when I was able to recreate a production bug, by replaying the JSON payloads to my local development server causing the same error to be raised.
When I first started using Charles Proxy, I was quite overwhelmed by the UI and how everything fitted together. This blog post will help you demystify the application, setup to inspect HTTPS traffic and demonstrate how to use Charles to rewrite requests and responses in three different ways.
For clarity, all examples in this post use Charles Proxy v4.2.7 for macOS Mojave.
Inspecting HTTPS traffic
If you haven’t already, I’d suggest downloading Charles and installing the app to follow along.
On the first boot you’ll be prompted with a dialog to automatically configure your network settings. You’ll need to Grant Privileges for Charles to work correctly.

Once granted, the main interface will open and there will likely be a flurry of activity that shows up in the Structure view. This list will quickly become full of different domains, so you can Focus on specific ones by right clicking to only show focused domains. Alternatively, use the Filter search input found on the bottom left of the window.
Try reloading this page and you’ll notice that for HTTPS requests, all resources will show as <unknown>.
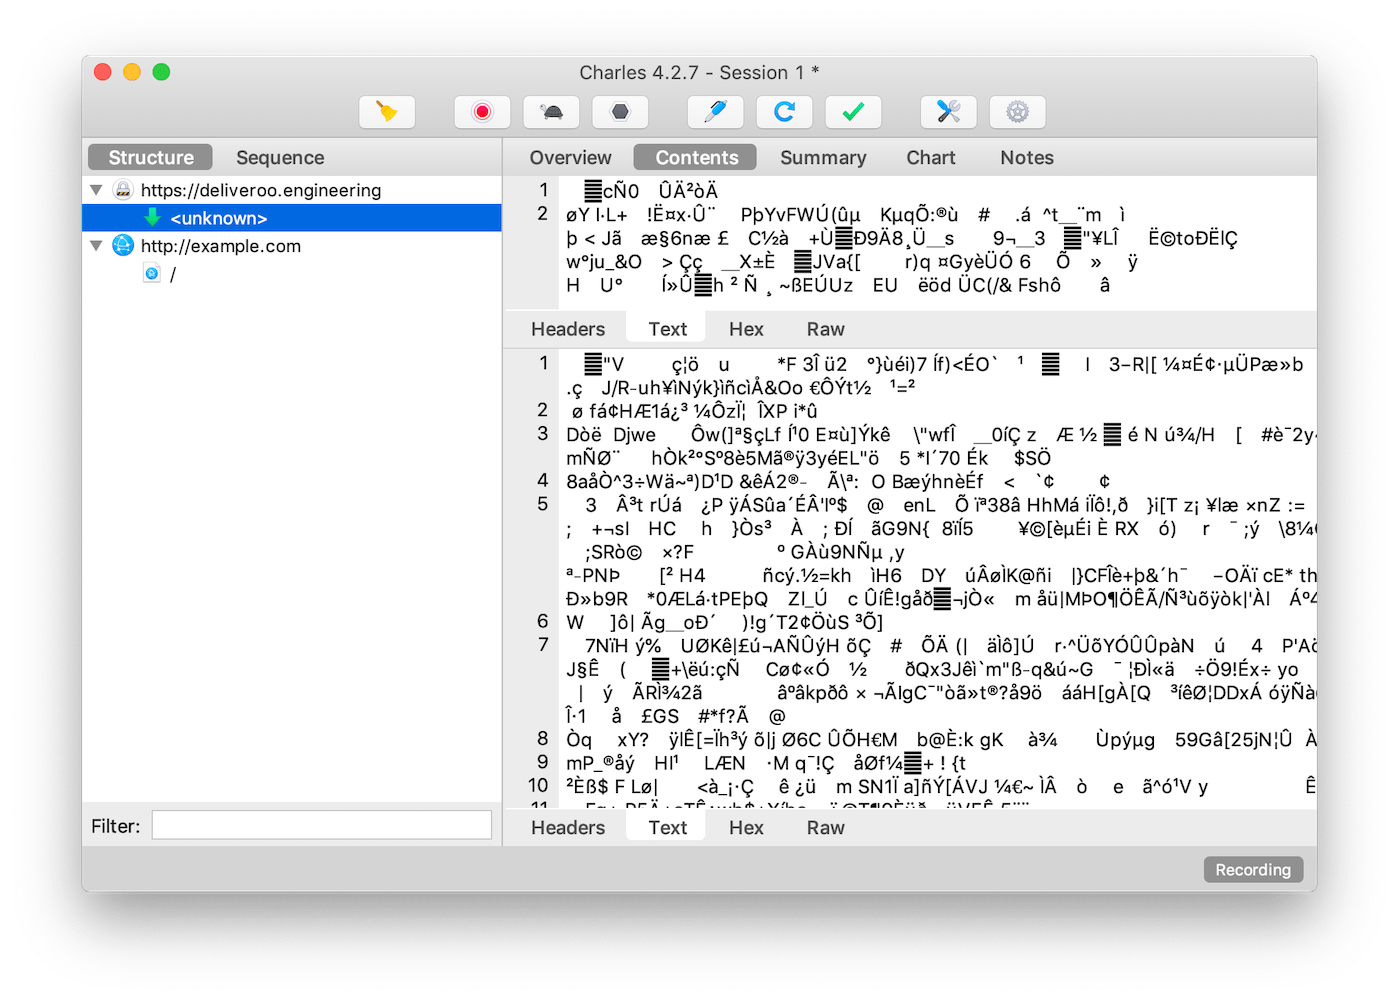
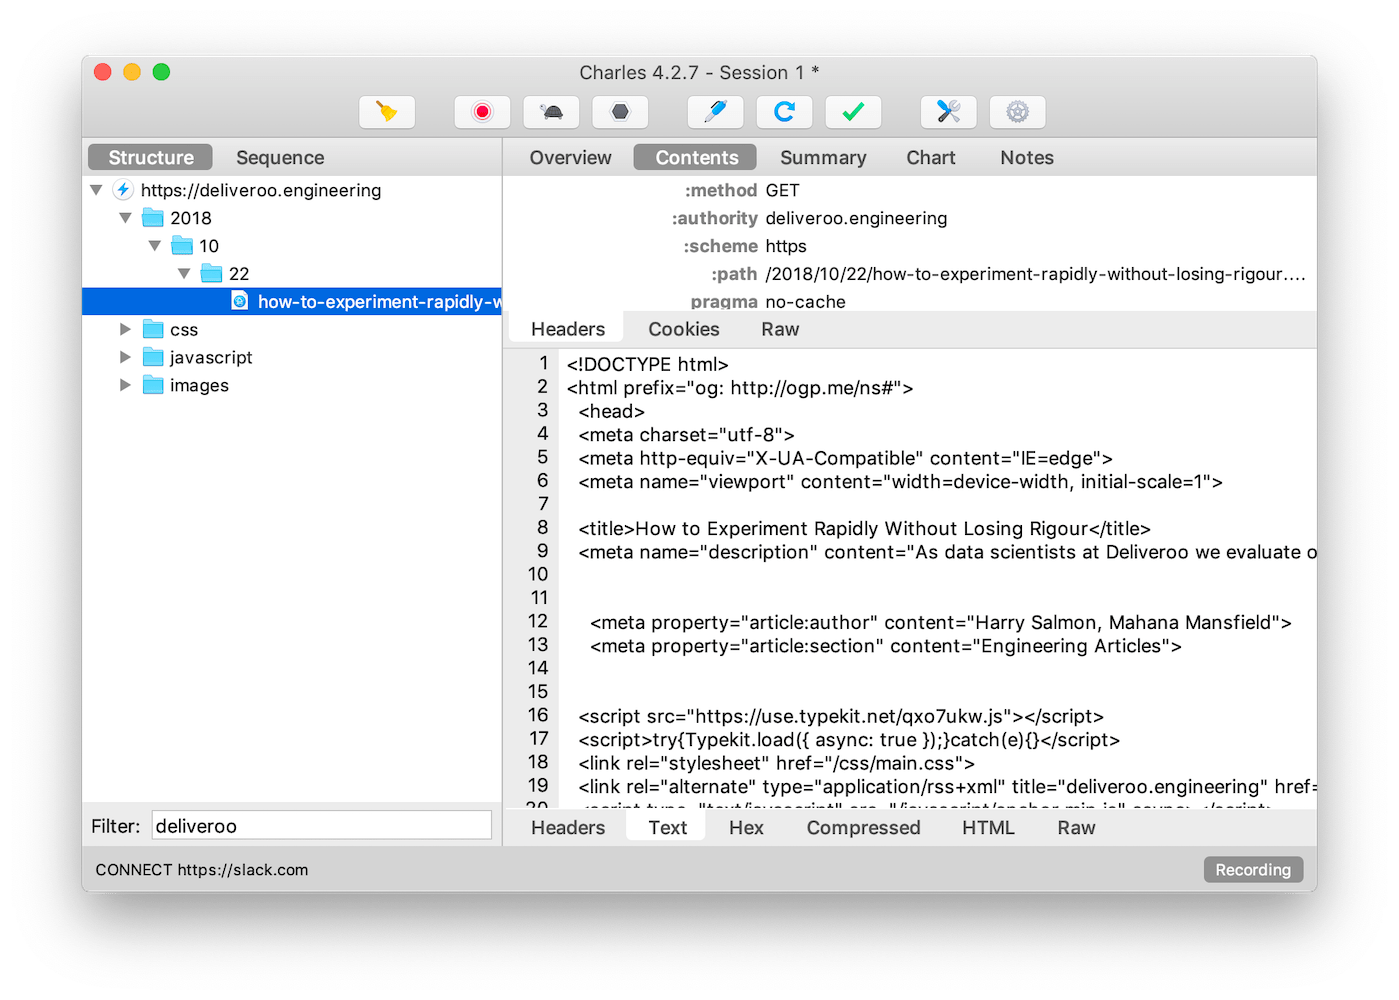
Fear not, for it is quite simple to install the Charles Root Certificate and configure individual URLs so that you can inspect the page’s contents.
To get to this point, you’ll need to install the Charles Root Certificate. For macOS find Install Charles Root Certificate from Help → SSL Proxying in the menu bar to add the certificate to Keychain Access.
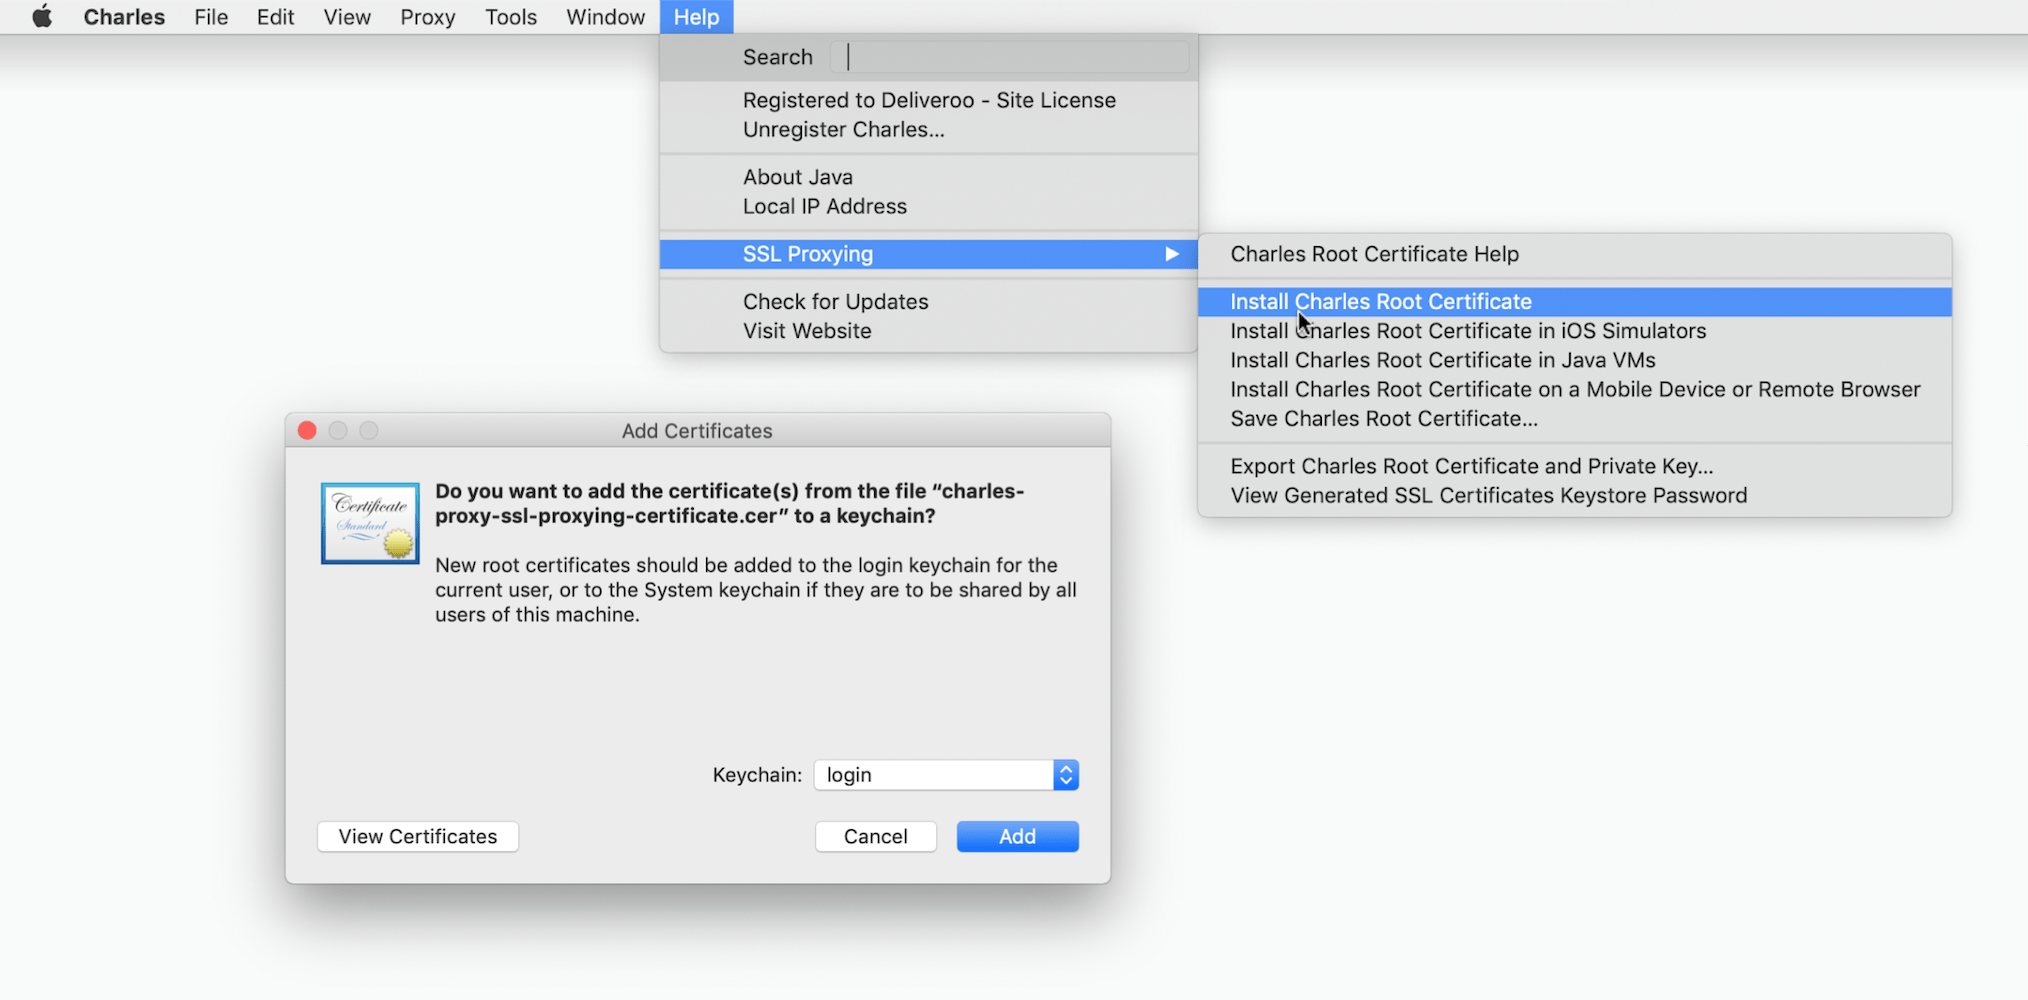
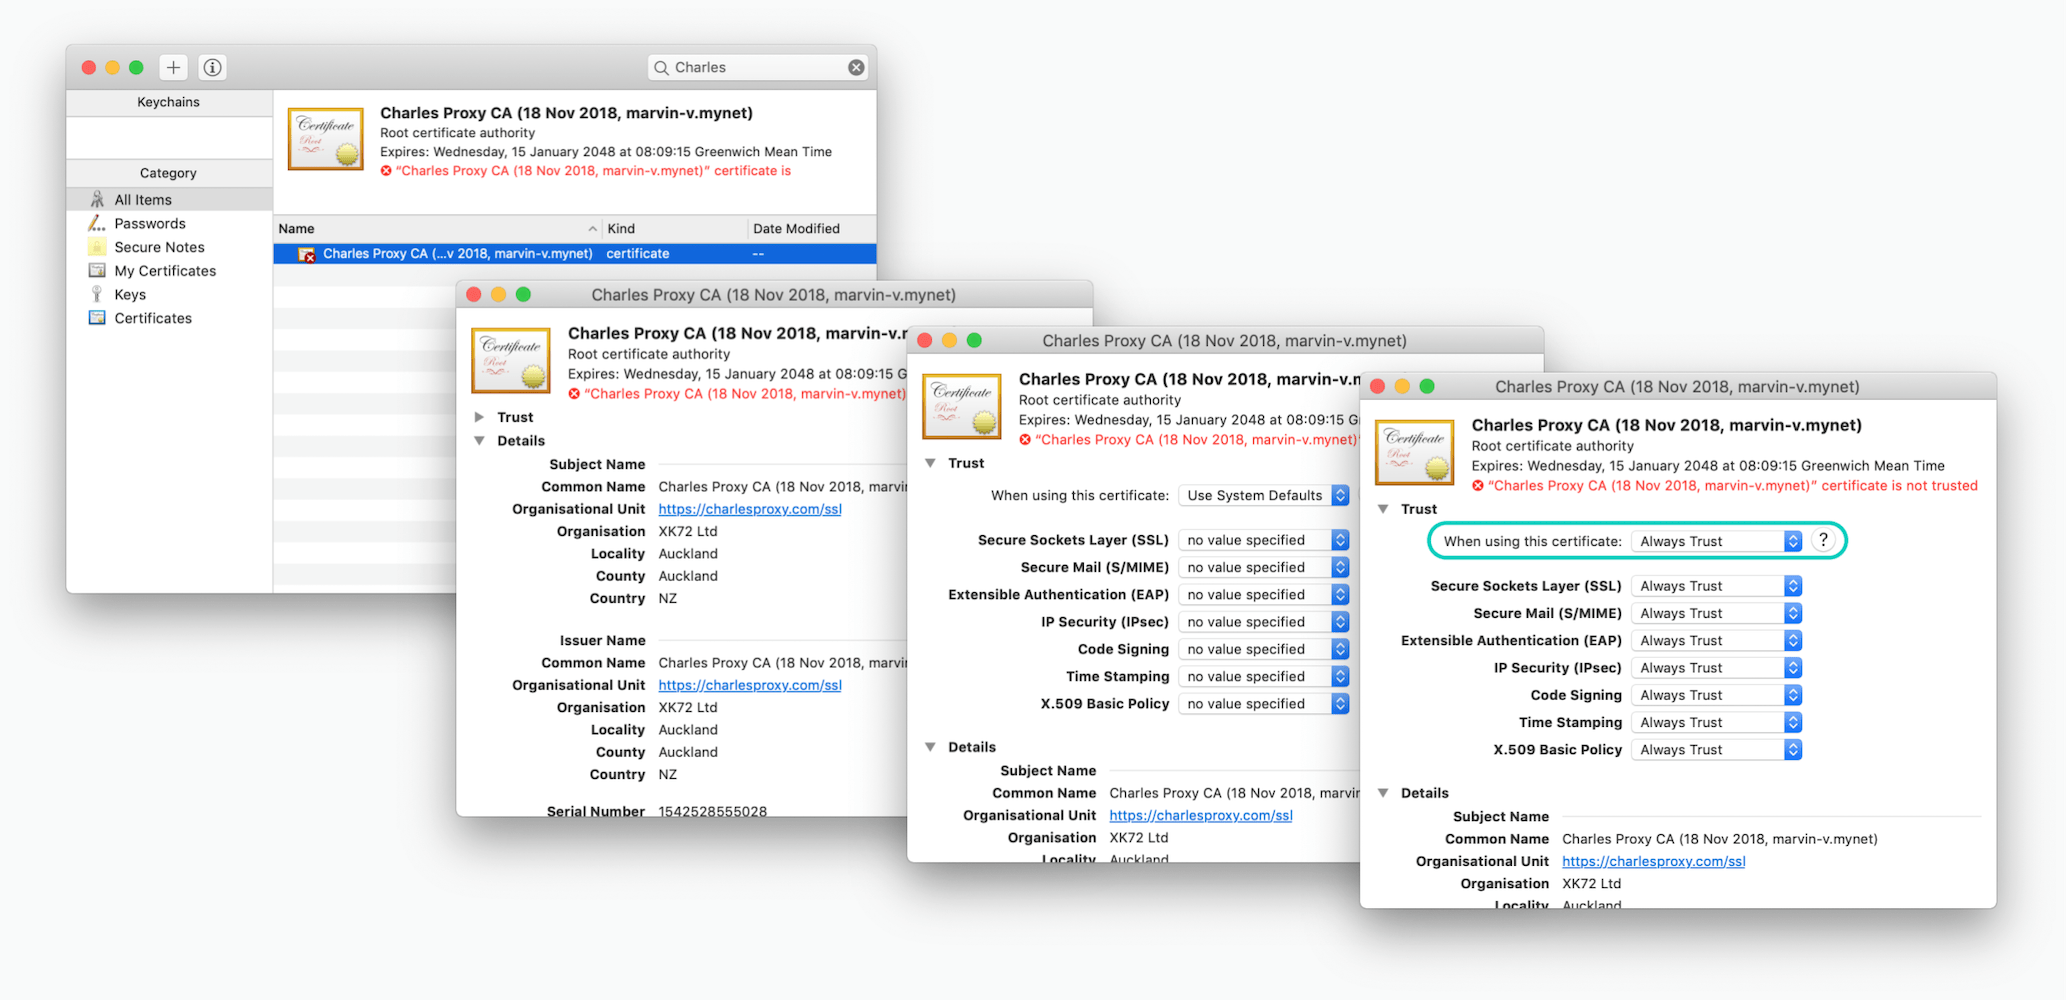
If it doesn’t pop up, and only opens Keychain Access it’s likely you’ve installed it in the past - you should be able to find it by searching for Charles (just make sure you’ve got All Items selected before searching).
Once you’ve added the certificate, you need to double click to open the certificate window and change the Trust settings to Always Trust. Close the window to save.
The last step is to configure a URL so that you can inspect the domain’s traffic. If this isn’t configured for the URL then you’ll see SSL Proxying not enabled for this host in the Notes row of the Overview panel as shown below.
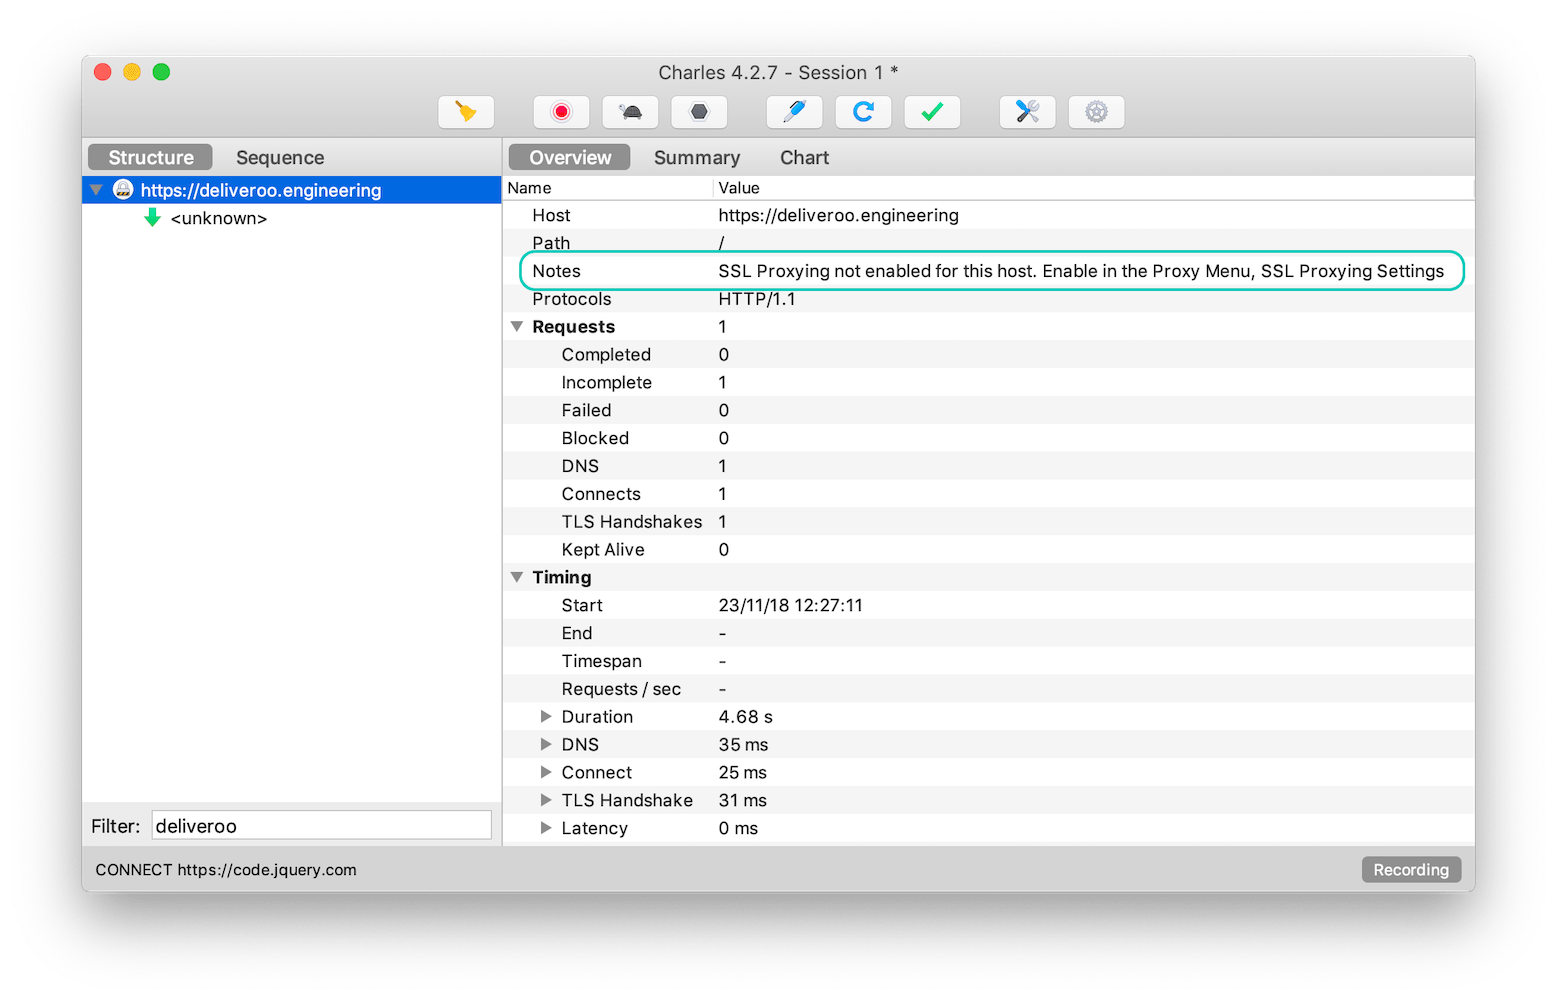
As the note suggests, you’ll need to find SSL Proxying Settings from Proxy in the menu bar. Add the full domain (e.g. deliveroo.engineering) or make use of wildcards. Just avoid making an entry of only * (wildcard): that will definitely start breaking all sorts of things unexpectedly.
You should now start to see the HTTPS traffic for that domain, try refreshing the browser page and you’ll notice as well that the icon next the domain has changed to a lightning bolt to show that SSL Proxying enabled for this host.
Rewriting traffic with Breakpoints
Now that we can inspect both HTTP and HTTPS traffic, we can start rewriting responses. The quickest way to achieve this is to use a Breakpoint. These are set up for specific resources (or Locations as they’re called in Charles Proxy) and will pause the response for us to modify before it reaches the client.
You can right click on any level of the resource tree structure to create a breakpoint.
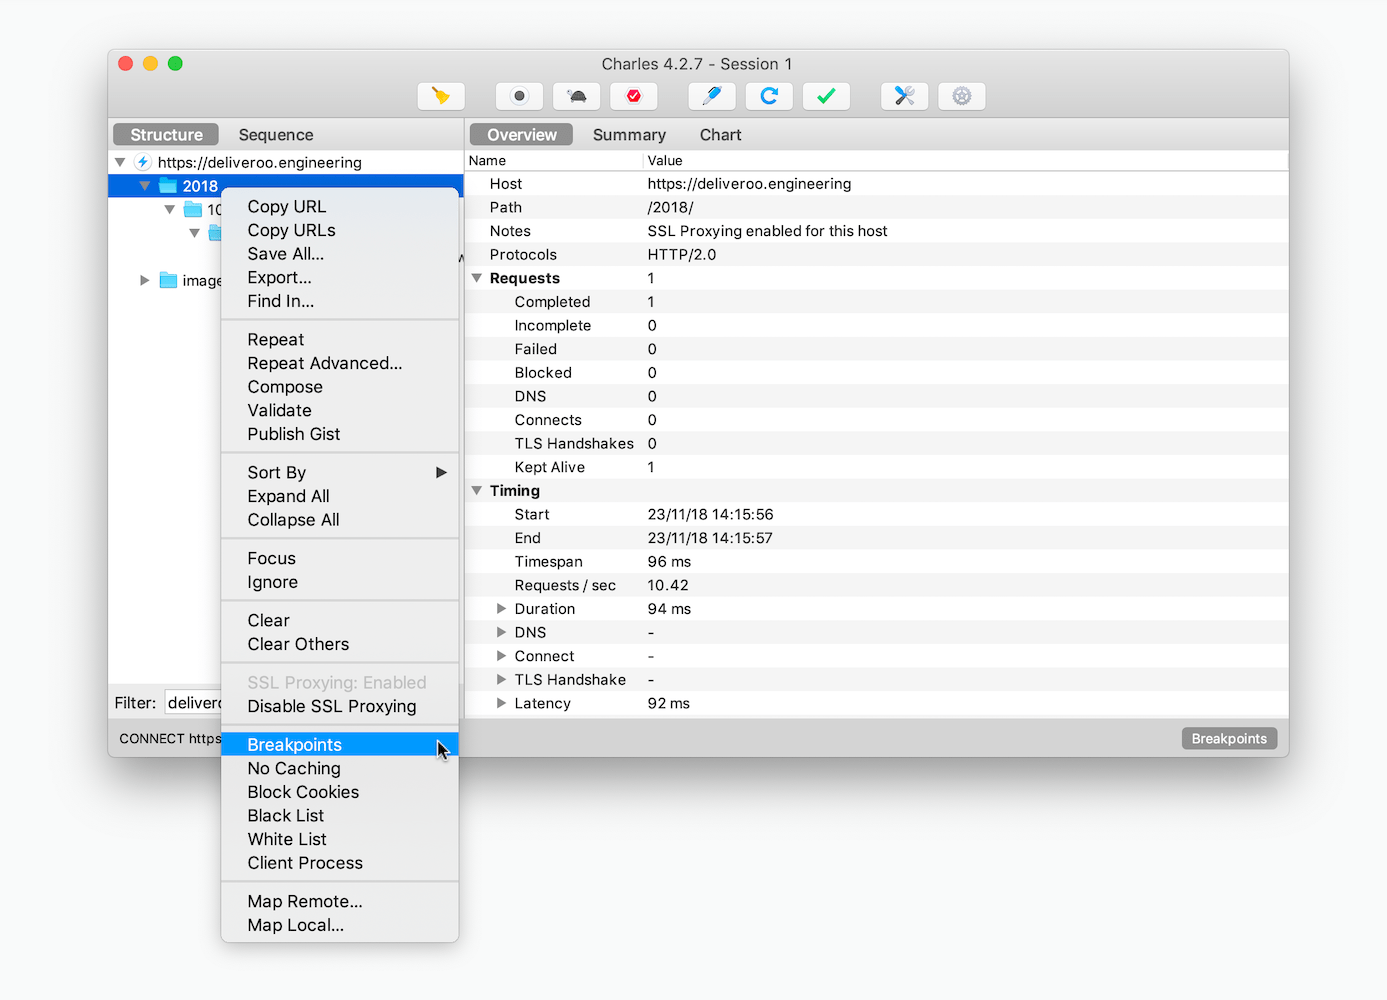
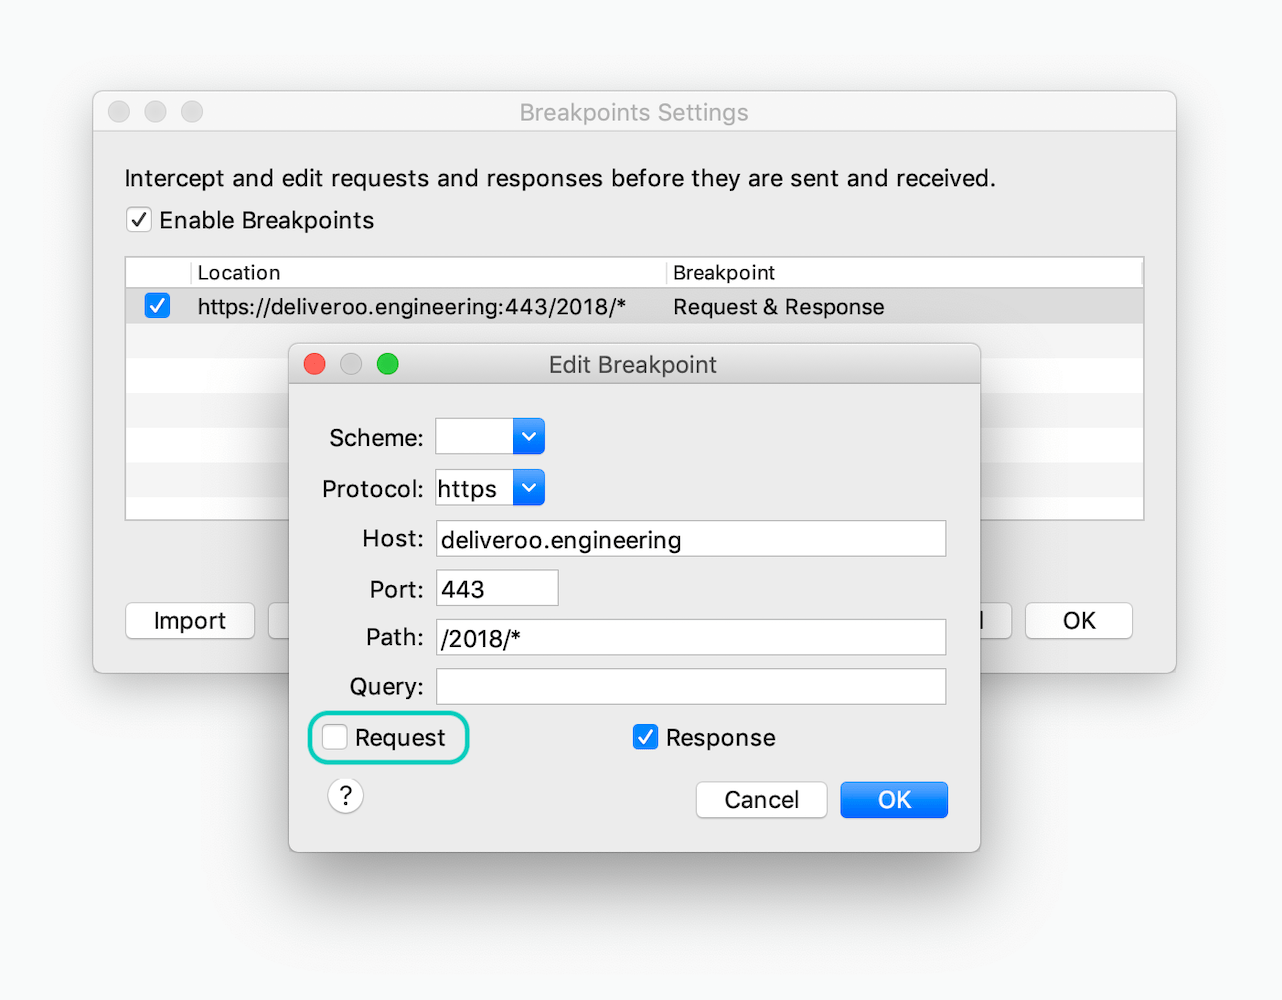
Without any dialogs or notification, this creates a Request & Response breakpoint. You can see the entry (and future ones) from Breakpoint Settings found in the Proxy menu bar item. If you don’t want to pause for requests (I have never needed this), you can configure the breakpoint to be only for responses - double click on the breakpoint entry and uncheck Request.
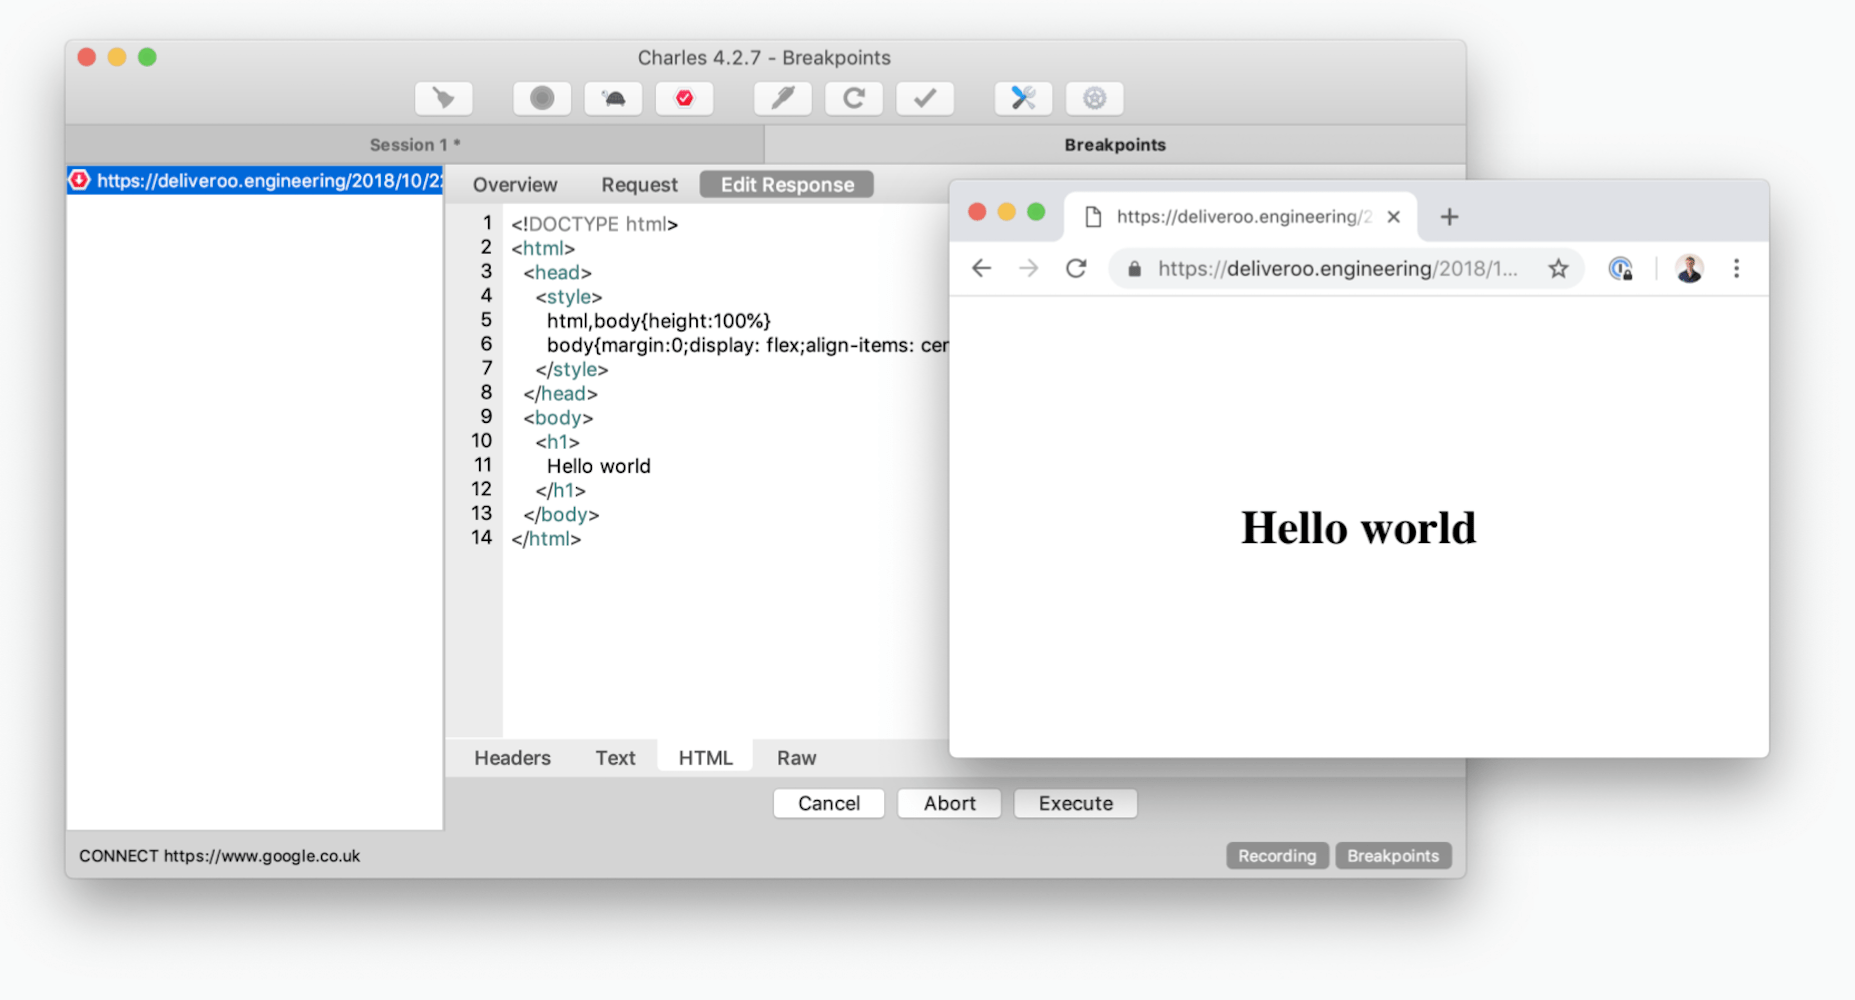
The next time you make a request that matches the URL, Charles will show a new tab listing the responses and/or requests queued up. This queue can quickly become overwhelming if your matcher is too greedy, shows both requests and responses or that the site is making regular poll requests. The Status row will be helpful in determining what’s going.
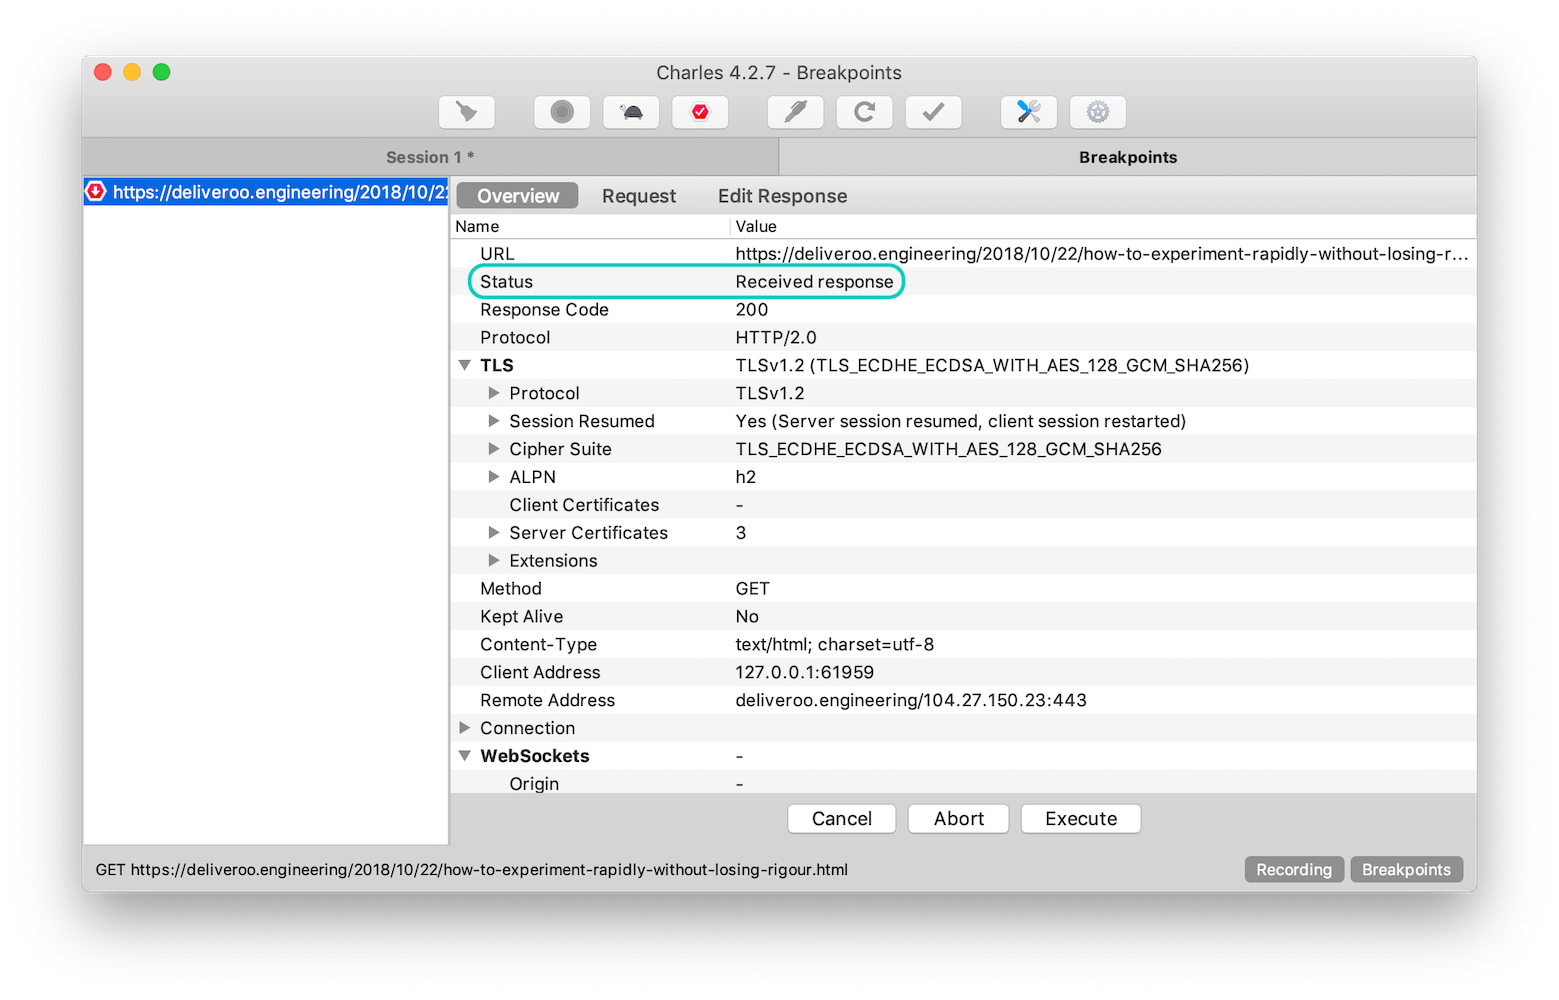
From within this tab, you can edit everything about the response: headers, cookies, JSON/HTML, etc. using the Edit Response subtab. Try changing the page’s response body using the different views available.
After you’ve edited something, you have a choice of actions to take:
- Execute applies the changes and allow the response to reach its destination,
- Cancel discards your changes but continues to send the response,
- Abort kills the response, simulating a network failure.
Rewriting traffic with the Rewrite tool
Breakpoints are a quick way to rewrite payloads and modify status codes, but it becomes time consuming for responses you want to modify the same way each time. Thankfully, Charles has other features to make this easier. One of them is called Rewrite and they can be used to modify almost everything about the request and/or response, without interuption and for each time they’re made.
We’ll use a Rewrite to modify the JSON body from https://reqres.in/api/users/1 (actual response shown below). Remember to setup a SSL Proxying setting for this new host.
# Use Charles Proxy HTTP Proxy (default port 8888) to pick up the request from cURL
$ curl --proxy localhost:8888 -s https://reqres.in/api/users/1 | jq .
{
  "data": {
    "id": 1,
    "first_name": "George",
    "last_name": "Bluth",
    "avatar": "https://s3.amazonaws.com/uifaces/faces/twitter/calebogden/128.jpg"
  }
}
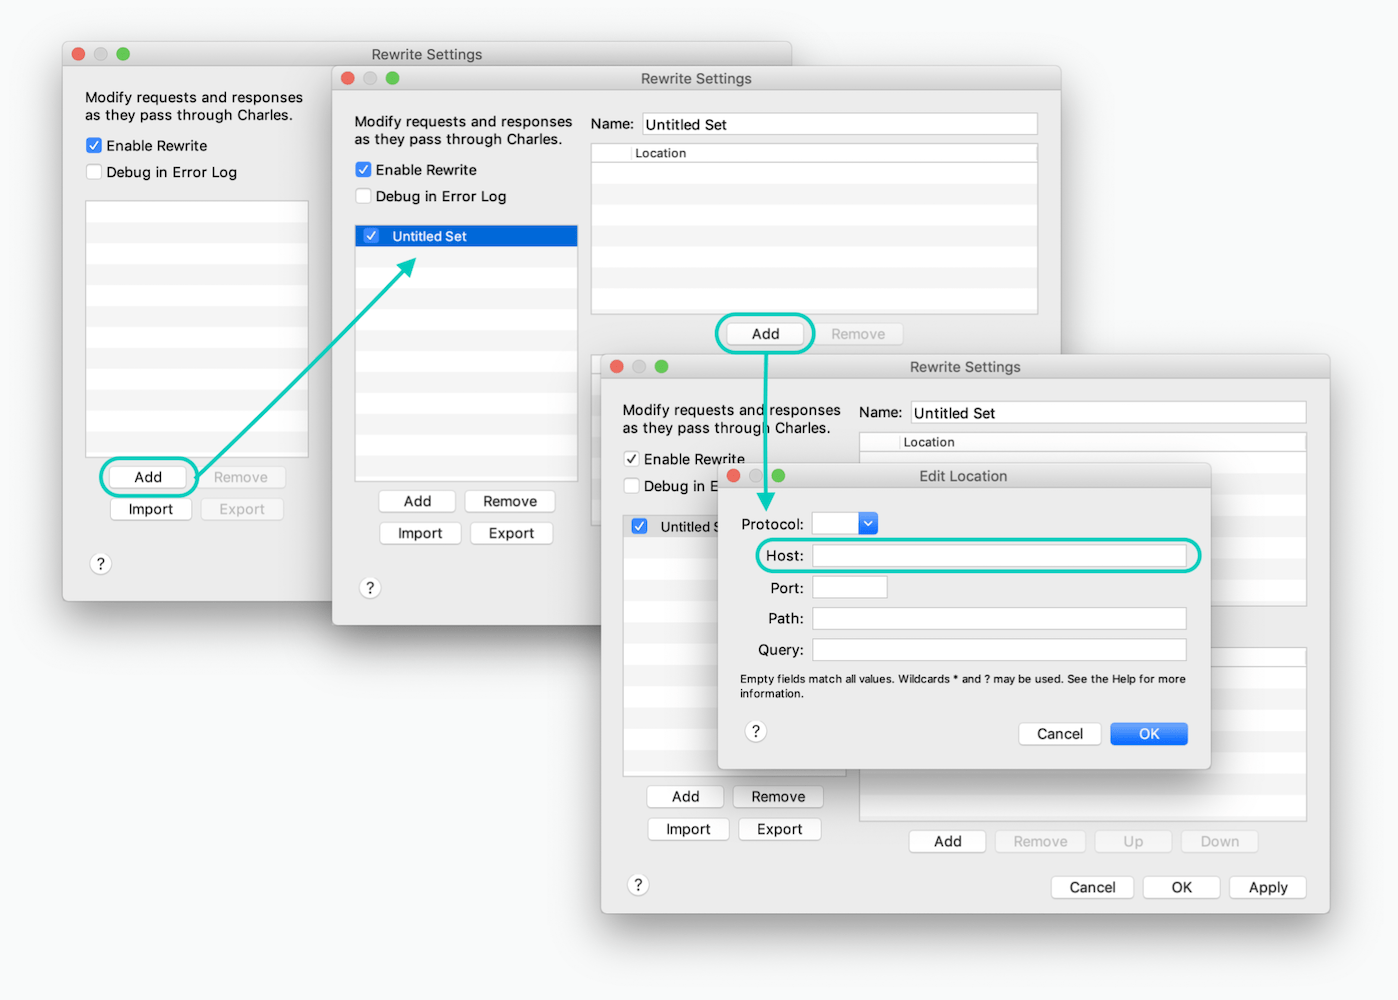
First, copy the full URL of the endpoint and navigate to Rewrite from the Tools menu bar item. Enable Rewrite setting and add a new set. Then add a Location (URL) that defines the set. Paste the URL to the Host field and hit Tab ⇥ to auto deconstruct the URL into the relevant fields.
Now we can add a Rewrite Rule to change the JSON response body to {"foo":"bar"}.
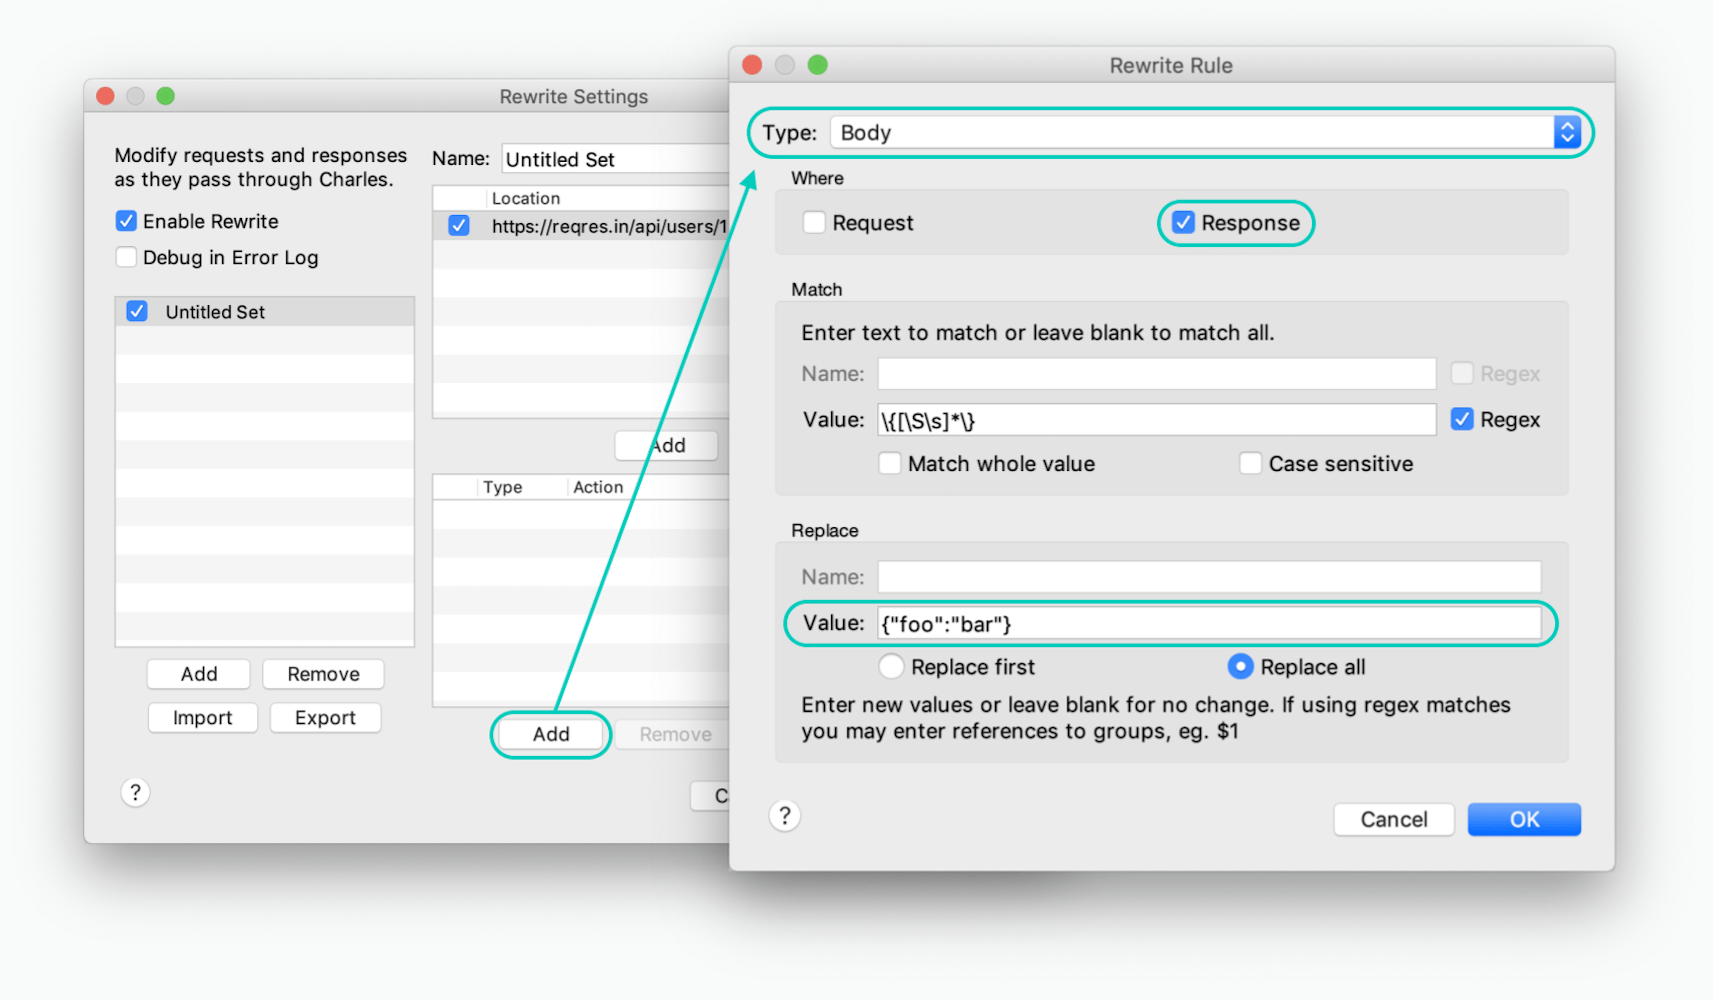
The Match regex used here is optional for this particular example, but you may find it useful in the future to target only JSON-like responses. You may want to use this if you have CORS preflight requests that you don’t want to modify. Thanks to Austin on Stackoverflow for this workaround.
After the Rewrite Rule has been added, be sure to Apply the changes and make the request again. If you’ve used a browser to make these requests, you may need to force reload or disable cache. For our cURL output, we now have our modified response instead of the original:
$ curl --proxy localhost:8888 -s https://reqres.in/api/users/1 | jq .
{
  "foo": "bar"
}
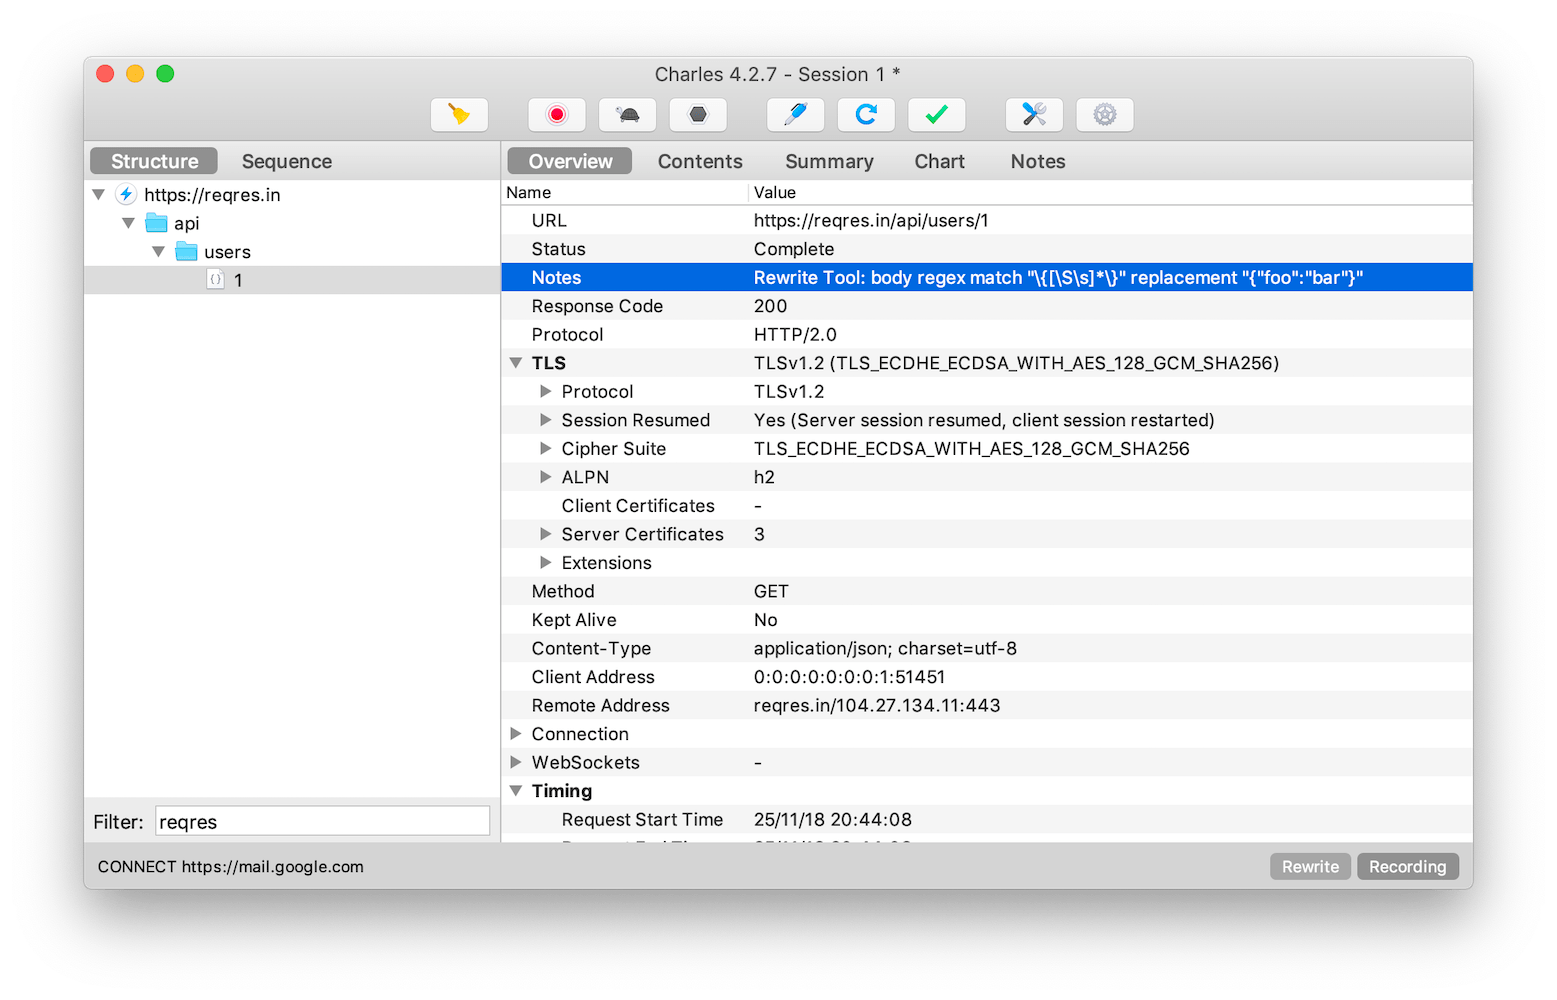
In the Overview tab you’ll see a new row for Notes with Rewrite Tool: body regex match "\{[\S\s]*\}" replacement "{"foo":"bar"}" so you’ll know when your rewrites are working correctly and or when they might not be correctly configured.
Rewriting traffic with Map Local
Another option you have to rewrite responses (and arguably the easiest one to manage) is Map Local. You’ll find this in both the Tools menu bar item and also at the bottom of the list when right clicking on a domain in the resource list. Let’s use the same example as before (https://reqres.in/api/users/1) to try it out.
If you’re rewriting different paths and resources, the most flexible way of setting up a Mapping is to copy the path structure as folders. For our example above, we’d need a folder for each path segment and a file for the final resource that’ll contain our JSON response:
$ mkdir -p ~/Charles/reqres.in/api/users && cd $_ && echo '{ "baz": "qux" }' > 1
Next, when creating the Mapping, keep the Path field blank and set the Local path to ~/Charles/reqres.in to represent the site.
The next time the request is made, it’ll match the URL paths to our newly created directory structure and respond with the contents of the file.
Once again, you can verify that this is working if you take a look in the Overview tab and specifically the Notes row: Mapped to local file: /Users/[username]/Charles/reqres.in/api/users/1.
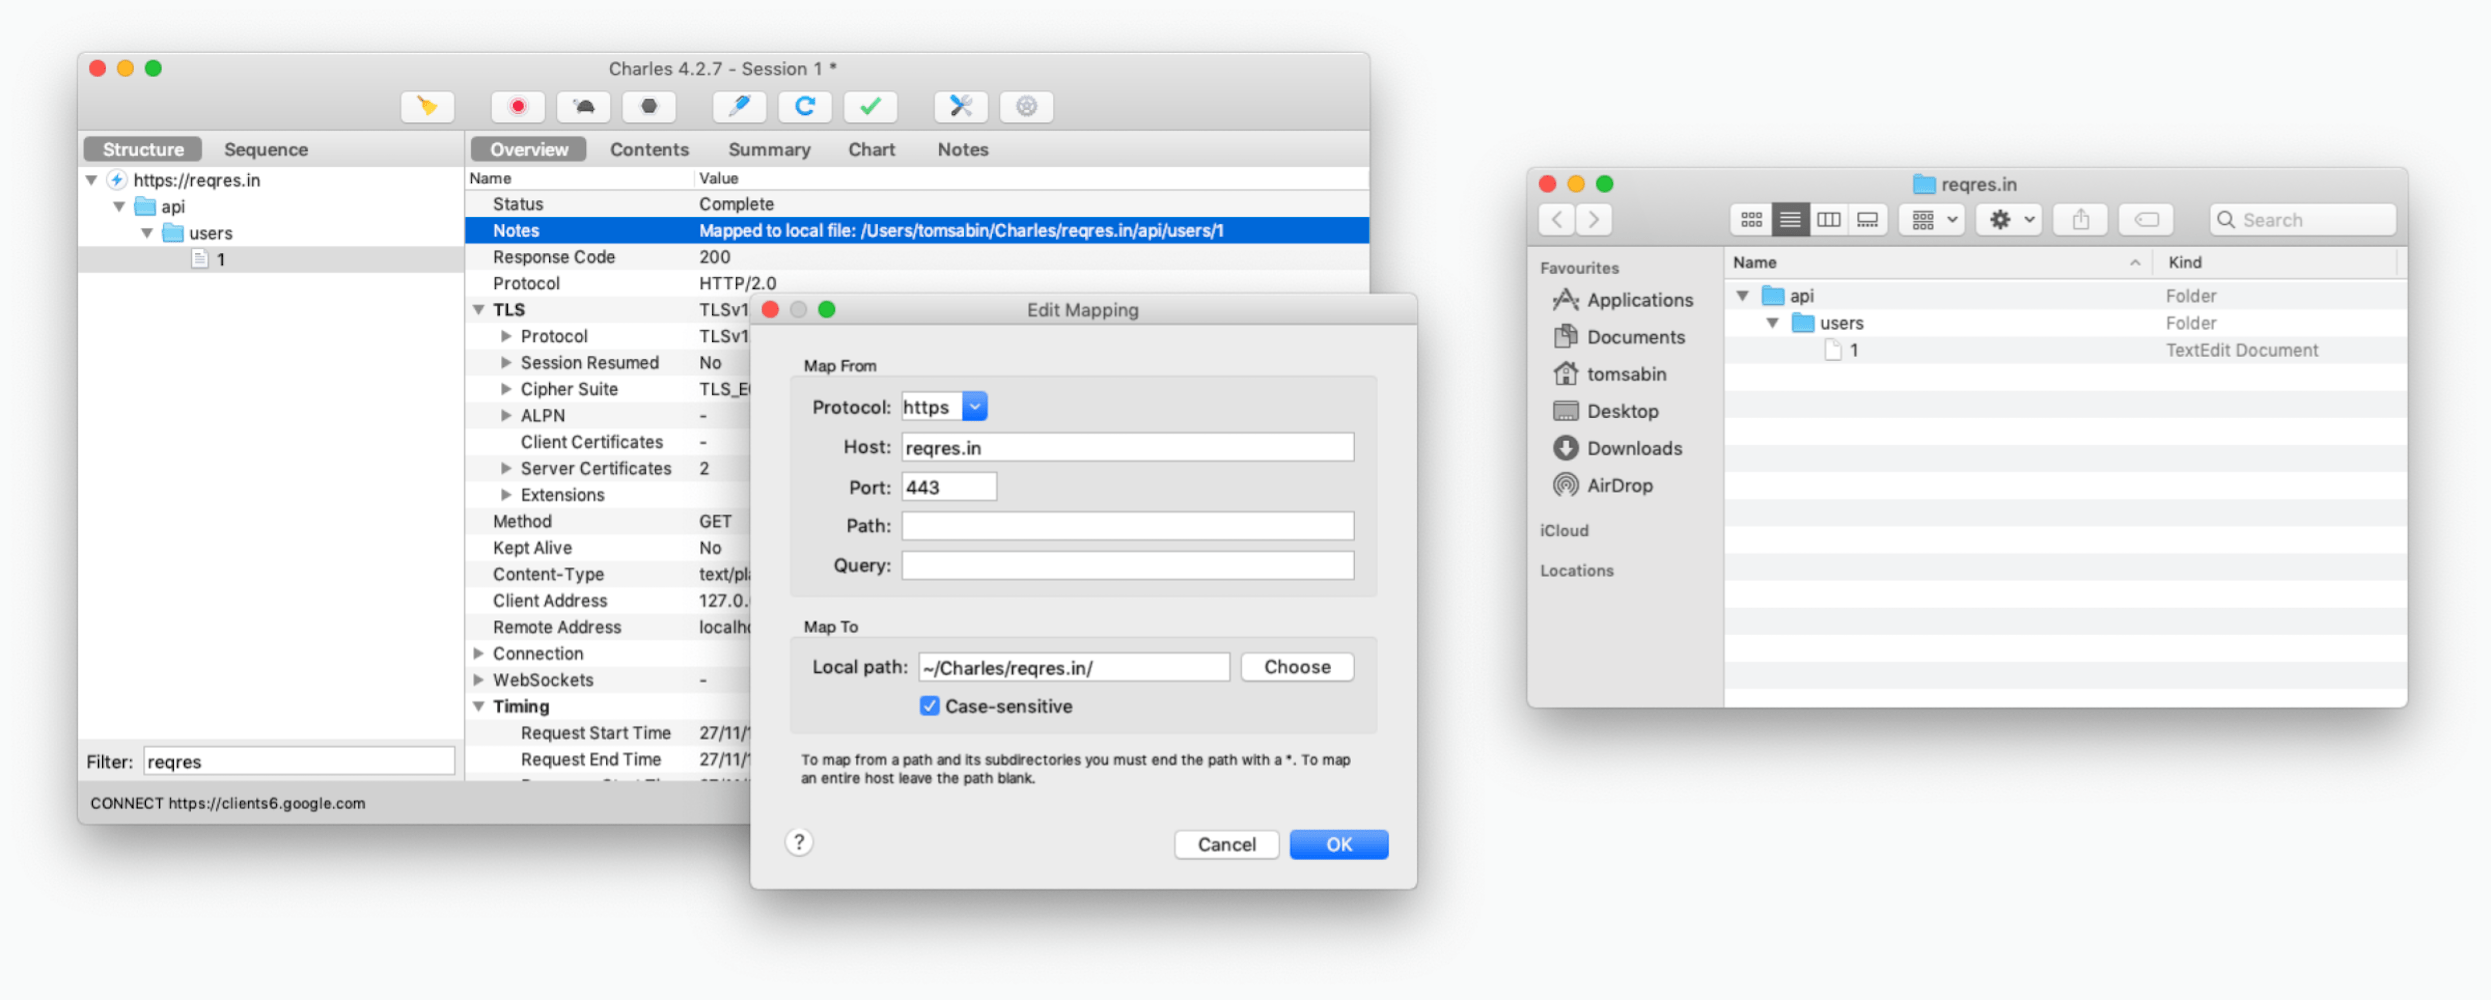
I’d love for us to be using this in our development workflow, but unfortunately the Mapping cannot be filtered by HTTP method, which causes all sorts of troubles for OPTIONS requests (used for CORS preflight requests). The preflight request matches the URL and therefore the response is rewritten and causes a bunch of browser errors, including:
Access to fetch at ‘[url]’ from origin has been blocked by CORS policy: Response to preflight request doesn’t pass access control check: No ‘Access-Control-Allow-Origin’ header is present on the requested resource. If an opaque response serves your needs, set the request’s mode to ‘no-cors’ to fetch the resource with CORS disabled.
We’ve had to settle with using Rewrites instead, targeting responses that already have a JSON body, so we know Charles is not modifying the CORS response. For now, the workaround (matching the body to \{[\S\s]*\}) is working, but it’s definitely not as easy as using Map Local.
Future thoughts
When it comes to local development, Charles has become an invaluable tool to rewrite the API responses without the need to hack around the application code. However, keep in mind that this has been within the context of client side JavaScript making the requests. Some frontend web applications that we work on are backed by a Next.js server that also provides server side rendering. This server will also make requests to the same APIs, which currently show in Charles Proxy still as <unknown>. It seems that the process that is running the Node server isn’t using the web proxy that Charles’ automatically set up in my System Preferences from first application load. There’s likely a few more hoops that I need to jump through to configure the local server correctly.
I hope that future versions of Charles Proxy will support matching URLs also by HTTP methods not just for Breakpoints, as it’ll open the doors to using Map Local more often but also to not need workarounds for the Rewrite tool. But for now, those workarounds are working for us.
